Evading stun with Transformation time

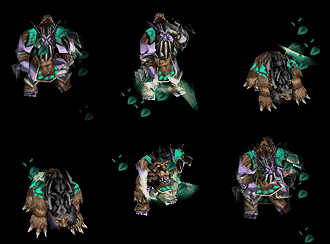
Targeted spells like stuns can be dodged with few transformations. Transformation is the act of changing in form or shape or appearance. For example, TB's metamorphosis, Lycan's shapeshift, Lone Druid's bear form, etc. However, only three transformations can evade stuns. [because only these three have a transformation time] These are:
1. Alchemist (Chemical Rage): 0.35 secs transform time
2. Lone Druid (True Form): 1.45 secs transform time.
3. Troll Warlord (Berserker Rage): 0.1 secs transform time.

For example, let us suppose a storm is coming to hit you, then you must be in the process of transforming to evade the stun. This is the simplest in case of Lone Druid with high transformation time. You can also evade aerial shackles using this method [You can run around while shackled]. Remember that you will get damaged but evade the stun.

However, other transformations cannot be used to evade stun because of their instant nature. These are:
Soul Keeper's Metamorphosis
Lycanthrope's Shapeshift
Dragon Knight's Elder Dragon Form
Undying's Flesh Golem

Dotasecrets Quiz No.4

Here is a short quiz of 5 questions. Lets see how many you get right? Click Here to attempt the quiz.

Visit the forum for more explanations to the solution of this quiz.

Written for version 6.58b.

Walking the Unpathable Terrain using Spectral Dagger

Well, the title says it all. I will not be describing about the skill here.

Spectral Dagger is a very nice skill that has a hidden use. It can allow you to pass through objects may it be creeps & heroes or may it be buildings, cliffs & forests. Cast it in a direction, then spam right-click a short distance (about 100 range) over the path and Mercurial will follow. You might want to carry around a Scroll of TP before you get BoT so you can disappear into the woods then teleport to the fountain. This has many uses, so be creative.

Now, how to use this special skill? Consider the situation:

You have to move from point A to B. There are two ways of doing this. You can right at B and follow the longer path or you could use spectral dagger and reach b much more quickly through the shorter path. I'll explain you how:

Release the dagger in desired direction (towards B), and spam right-click short distances in the direction. Do not simply right click B after using dagger because then spectre won't use the shorter path. You can also do SHIFT + right-click spam to make sure spectre follows the path.
This is extra useful when you find yourself in sticky situations such as ganks, and a good way to escape if you notice the gank in time is to run into the forest where the opponents cannot reach you and teleport out.

I hope you remember this post next time you play spectre.

:)

Chaos Queen... Guide to Spectre

Spectre has been my favourite hero since a long time now. She is simply unstoppable once she gets going. Her ability to farm and gank at the same time makes her the pick and ban of almost each and every competitive game. Spectre mainly has 2 distinct roles in games, a mid game ganker and a late game carry. Let us have a look at this wonderful hero killer...

View the complete guide

You will have to get registered first to view this guide.

Last Months' Did u Know?

Click here to see last months' did you know?

Blink Dodging

EDIT: This post is not like "How to blink dodge?". It's more like "When can I blink dodge???".

Some days back, someone requested me an explanation on Blink Dodging i.e. which spells can be dodged using blink. So this is a post about it. It’s still not complete but exhaustive enough to cover the point. But first, some important points about blink:

- Blink is an ability that teleports the user a short (long distance in case of Furion) distance away. It is often used for initiating and escaping fights, and can even be used to dodge spells and attacks. Heroes with blink or blink-like skills are therefore difficult to kill and frequently employed in competitive games because of their extensive mobility/ganking potential. Kelen's Dagger is also a common item choice by heroes that require precise placement for their skills' effectiveness (Earthshaker, Crystal Maiden), or that depend heavily on the element of surprise (Bradwarden).

- Blink has both a minimum and maximum distance. Attempting to Blink shorter than the minimum distance will generate an error message, but attempting to Blink farther than the maximum distance will instead send the hero 4/5 of the maximum distance in that direction.

- Blink usually displays an animation at the target point when the spell begins casting, not when the spell is actually cast. Quickly canceling the skill by hitting Stop will therefore display a Blinking animation without actually performing the skill, providing a means of faking out opponents. This is most commonly used with Furion's Teleport, because of the long casting time and obvious animation.

- Blink and Blink Strike are two different skills. So, what I write in this post may or may not apply to blink strike.

Blink Dodging


Blink can be used to dodge most spells with a projectile. The hero must Blink after the projectile is released and before the projectile makes contact. The impact animation of the projectile hitting is still shown, but the spell will have no effect on the Blinking hero. If the projectile is homing, the projectile will follow the hero to its new location and display the impact animation there; otherwise, the impact animation will be shown at the hero's location before Blinking.

To determine if you can blink dodge a particular spell or not depends on the base ability of the skill.

- Storm Bolt based abilities - eg. Storm Bolt, Hell Fire, Magic Missile, Unstable Concoction, Ogre Magi's Fireblast, Spirit Lance, Shuriken Toss, Chaos Knight's Chaos Bolt, Mana Void, Assassinate, DK's Dragon Tail, Lucent Beam, Lightning Bolt, Rexxar's Primal Roar, etc. [yes there are more!]- These can be dodged no matter what the speed of the projectile is unless you'r real close to them and they just appear on top of you. Dodging slow projectiles like storm bolt is easy but its rare to see people dodging fireblast and chaos bolt due to their high missile projectile speeds.

- Shadow Strike based abilities - eg. QoP, Viper Strike - Can be dodged like storm bolt based abilities.

- Fan of Knives missile abilities - eg. Scream of Pain, Heat Seeking missiles, Echo Slam, Necrolyte's Death Pulse, Quill Spray, etc. - These can also be dodged but blink dodge doesn't help it, you need to escape from it for 30 or so seconds and it will not damage. So practically, you can't dodge it, but death pulse is slow enough for to blink away from it for a long time.

- Chain Lightning based abilities - eg. Chain Lightning, Furion's wrath of nature, mjollnir, etc. - Chain lightning actually damages by searching for a target after each bounce. After each bounce, it searches for a target in a particular AoE (different for different spells) and stops if no target is found. You can dodge it only if you can get out of the AoE of the skill before it acquires you the target. Once it acquires your hero as the target, you can't dodge it even with blink.

- Acid Bomb
Abilities - eg. Tidehunter's Gush, Ogre Magi's Ignite, etc. - Cannot be dodged.

- Parasite Based Ability - Spawn Spinderlings - Can be dodged.

- Ensnare Based Abilities - Naga's net, Pit of Malice, Earthbind, Dark Troll Warlord's Ensnare -
Point#1, you can't blink when you are ensnared.
Point#2, Naga's net and troll's ensnare use a projectile before ensnaring. The target gets ensnared whatsoever and cannot be dodged... but, you can blink while the net's projectile is in air so you can get into a safer position.
Point#3, You can dodge earthbind and pit of malice... just don't get caught into it.

- I may still be missing some points in this post... Kindly make a note to me if thats the case. The information I presented here is 99% correct in my knowledge. I'm still searching for exceptions and would be happy if someone corrects me.

- If someone gets inspired by this post and wants to post it in his own blog/website, plz give the credit to dotasecrets.co.nr and put a source link on your website.

- I've not included the complete explanation to many base abilities in this post. I would be posting on these in the "dotasecrets" section in our forum dssforum.co.nr. You could also use the forum to get explanations as I would not be able to answer every question posted. :( [Time Constraints]. Thanks for your cooperation.

:)
Dotasecrets Quiz No.3

Here is a short quiz of 5 questions. Lets see how many you get right? Click Here to attempt the quiz.
Made for version 6.58b.

The New Undying

Dirge - The Undying
With 3 new skills, Dirge is like a mystery and a lot of things need to be clarified. So, here's an exhaustive description of his skills:

Decay
Dirge saps away the strength of enemy heroes (4 Strength) and retains it for a period of time.
Duration: 21/24/27/30 secs.
Cooldown: 11 secs.
Mana Cost: 70/90/110/130
Casting Range: 625
Area of Effect (AoE): 300
Damage: 30/60/90/120.

- The effect from Decay is stackable, both on Undying and the affected enemies.
- Decay deals Magical damage which is reduced by the target's Spell Resistance and is blocked by Spell Immunity.
- The Strength loss happens first, so Decay effectively makes the target lose 76 HP + 30*DecayLevel
- Decay cannot set a hero's Strength to lower than 1.

Soul Rip
Redirects the flow of living energy through a target friend or foe, damaging them or healing them depending on how many units are near it. 25 for each unit.
Cooldown: 25/20/15/10 secs.
Mana Cost: 50/75/100/125
Casting Range: 650
Effect: Damages/Heals the target by 25 for each unit around; 5/10/15/20 units max.

- Soul Rip damages (if target is an enemy) or heals (if target is an ally) the target for 25 damage per unit within 650 range of the target. All unit that are counted are dealt 25 damage, whether friend or foe. The damage to each unit can be used to deny allied creeps or heroes as well which results in a suicide.
- The Undying and the target are not counted when using Soul Rip, only nearby units are counted.
- Soul Rip deals Magical damage to enemies which is reduced by the target's Spell Resistance and is blocked by spell immunity. For allies however, the damage is done by HP removal so that the damage does not stop consumables functioning or prevent usage of Kelen's Dagger.

Tombstone
Unholy powers summon a cursed tombstone. Zombies will frequently (every 3 seconds) spawn near each enemy unit and attack them. Zombies have a passive that additively slow their target by 7%. Zombies cannot be controlled.
Duration: 15/20/25/30 secs
Cooldown: 60 secs
Mana Cost: 120/130/140/150
Casting Range: 250
AoE: 600/800/1000/1200
Extra Effects: The Zombies gain 50% attack rate and movement speed if the enemy is below 100/200/300/400 hp.

- Zombies will not spawn to attack buildings.
- The tombstone, though Magic Immune, can be healed using Soul Rip.
- Zombies will only spawn after the Tombstone is summoned, and once to replace a dead zombie summoned form the same tombstone.

Flesh Golem
Looks like Armored Pudge to me. :D . Anyways,...
Dirge's hatred for all living beings allows him to transform into a monster. While he's transformed he carries a plague that affects nearby enemy units. Strength of the plague depends on how close the enemy is. Amplifies damage enemy units receive and reduces their movement speed. When a plagued unit dies, its essence is transferred back to the Undying, healing it for 12(3)%* of its maximum life.
Duration: 30 secs.
Cooldown: 90secs.
Mana Cost: 100
AoE: 750
Effects: 20%/25%/30% extra damage.

- The extra damage from Plague is not reduced by anything, but blocked by Spell Immunity.
- Creeps heal you for 3% and Heroes for 12% of your max hp if under the effects of Plague.
- Plague Aura Damage Amplification:
at max distance (700): 5/10/15%
at closest distance (150): 20/25/30%
- Even if Dirge is not the one that killed the hero/unit, its soul will still return to heal him.

Now some important points about the living deads/zombies:
Duration: Permanent/till death
Hit Points: 30
Sight: 1400/1400 [Pretty nice at night-time]
Movespeed: 375 [Decent considering increased ms when enemy is at low hp]
Damage: 37-45 (Piercing - Deals half damage to heroes and 1.5 times damage to creeps)

- The Living dead are summoned automatically near every enemy unit in a 600/800/1000/1200 AoE of the Tombstone.
- Zombies will not spawn to attack buildings.
- Zombies cannot be controlled.
- If the Tombstone is destroyed or ends its duration, all summoned zombies will die.

Zombie's Skills:
Spell Immunity
Renders this unit immunity to all spells.

Bloodlust
The Zombies gain 50% attack rate and movement speed if the enemy is below 100/200/300/400 hp.

Deathstrike
Zombies additively slow their target by 7%.
Duration: 2.5 secs

Denying Allied Heroes!!!

Well, this is some nice stuff we all should know. You can actually attack/deny an allied hero! But... conditions apply.

Condition #1
The allied hero should have less than 25% hp left.

Condition #2
It should suffer from either of the following buffs:
- Doom
- Shadow Strike [not Viper Strike]
- Shadow Word [Surprisingly]
- Curse of the Silent

So, its good if you deny an allied hero so the enemy doesn't get the gold, but first make sure he's going to die of the spell! Many a times players deny allies who actually would have survived with very low hit points.

A Request...

It's a request to all who find something interesting on this blog and want to post it on their website... please give the credit to dotasecrets.co.nr. A link to the related post will do.

The Mass Murderer - Lich [Chain Frost]


Description: bla bla bla... releases a jumping breath of frost that jumps 7 times (8 times with Aghanim's Scepter). Deals 280/370/460 damage(370/460/550 with sceptre) per hit.

Using this skill: This is a potential double/triple kill skill. The best situation when you can use this skill is when you form a triangle with enemy heroes i.e. just two enemy heroes close enough to make chain frost bounce ensuring a double kill. The skill is generally used after a mass AoE nuke (like Earthshaker's EchoSlam) that wipes out all enemy creeps.

Skill Mechanics
: Important points:
- Slows movement speed by 30% and attack speed by 20%. [unstackable by subsequent frost novas]
- The first target unit is set to sleep for 0.01 seconds [So you hear a sleep sound when this skill is cast]. This acts similarly like ministuns since it interrupts channeling spells. The sleep is not blocked by magic immunity.
- I bet most of you didn't know this... The casting range of chain frost is 750 which increases to 850 with Aghanim.
- Does not bounce to mechanical units.
- Technically, the frost orb does not bounce from unit to unit, but from "unit" to "unit location". That is, on each bounce, the orb is launched from right where the previous unit is, but it does not follow the target. Instead, it simply travels to the point where the target unit is when the orb is launched, and Frost Novas the target unit when it reaches the location, regardless of where the target unit actually is. [So a blink/522ms won't help you escape a frost orb if its coming for you]
- Chain Frost needs sight of the target to bounce to it, so casting it into fog of war isn't a good idea.
- Linkens Sphere can block a maximum of one hit from chain frost. The bounces will still continue.
- The slow can't be removed by Purge.
- Chain Frost deals Magical damage which is reduced by the target's Spell Resistance.
- Chain Frost bounces to nearby spell immune units but doesn't deal any damage.

Dodge - Ways, Effects & Stacking

To dodge an attack is to negate the attack/damage, or say to take no damage from the effort.

Ways to Dodge

1. Evasion - Evasion is an ability that provides a dodge chance for the owner of the ability.
- Evasion comes from items like The Butterfly and Radiance, and skills like Jinada (Bounty Hunter), Drunken Brawler (Panda), Blur (Phantom Assassin), and Phantom Edge (Phantom Lancer).
- Evasion does not stack with other sources of Evasion. The highest source of Evasion overrides all other sources of Evasion. So if Phantom Assassin with 4 levels of Blur (28% Evasion) obtains a Radiance (8% Evasion), she will have 28% chance for Evasion. If she obtains a Radiance (8% Evasion) and The Butterfly (30% Evasion), she will have 30% chance for Evasion. Evasion only works against normal attacks.

2. Miss - Miss is typically a debuff on the opponent which causes them to miss.
- This comes from spells like Smoke Screen (Stealth Assassin), Laser (Tinker), Blind (Troll), Drunken Haze (Panda), Incapacitating Bite (Spider), and Crippling Fear (Night Stalker). Laser, Drunken Haze, Incapacitating Bite, and Crippling Fear do not stack with each other, but they will stack with Smoke Screen and Blind. Miss only works against normal attacks.

3. Terrain Advantage - The 3rd type Dodge chance to miss is Terrain Advantage. Terrain Advantage occurs when a ranged attacker attacks uphill. Currently, this is a 25% chance to miss. Terrain Advantage only works for normal, ranged attacks.

4. Pseudo evasion - Pseudo-Evasion is an triggered evasion mechanism that uses code to heal a unit for the damage taken and works against all attacks and abilties as long as the damage taken is less than the recieving unit's max hp. This form of evasion stacks with itself.
- If a unit has two forms of Pseudo-Evasion and both execute, the unit will be healed for the damage taken (Damaged Once, Healed Twice).
- Two examples of this skill are Void's backtrack and Spectre's dispersion. More to be discussed in some other post.

Stacking Dodge

The way to calculate your total chance to Dodge damage is

P = 1 - (1 - E) * (1 - M) * (1 - T1) * (1 - T2)
where
P is your Probability to Dodge damage,
E is your chance for Evasion,
M is your opponent's chance to Miss,
T1 is your opponent's chance to "miss" due to Terrain disadvantage and
T2 is your chance to avoid damage due to Triggered Evasion.

Each of the four factors (Evasion, Miss, Terrain, and Triggered) work independently of each other. As such, a source of Evasion will always stack diminishingly with a source of Miss or Triggered.

Effects of Dodge

If you dodge an attack, many attack modifiers will not work on the attack. For Triggered Dodge, however, it is different. On a dodged attack (not dodged by Triggers)...

* Cleave will not take effect
* Lifesteal will not take effect
* No attack damage will be dealt
* Bash will not take effect
* Pre-attack effects will work (eg. Craggy Exterior, Counter Helix and Return)
* Orb Effects will not take effect
* Buffs will not be placed

Post inspired from DA-wiki.

Dotasecrets Quiz No.2

Here is a short quiz of 5 questions. Lets see how many you get right? Click Here to attempt the quiz.

Requiem of Souls

Skill Description: Summons evil spirits around you dealing damage to units in the area. Number of spirits is related to the number of souls stored. Lowers movement speed and damage of nearby units. The closer the units are the greater the damage. 
Level 1 - Spirits dealing 80 damage each
Level 2 - Spirits dealing 120 damage each
Level 3 - Spirits dealing 160 damage each
Mana Cost: 150/175/200
Cooldown: 120/110/100 seconds

Using Requiem of Souls: Requiem of Souls can be an extremely powerful spell, especially during a team fight, when the huge AOE damage and slow can possibly kill or cripple multiple heroes easily. Firstly, the damage is dependent on Necromastery - If you have less then the maximum amount of souls stored, it is usually not worth popping off Requiem of Souls. Next, Requiem of Souls requires Nevermore to be right next to his target. This is a problem as he not only has average movespeed, but also low Hit Points and no skill to help with survivability. Effective utilization of this spell usually requires a mobility item such as Lothar's Edge, allowing you to slip into the middle of the enemy team and cast Requiem of Souls, or Kelen's Dagger, allowing you to cast the spell just near the enemy.

Skill Mechanics: Important points:
1. The skill has 1 second casting time. [It's not channeling]
2. The skill lowers the movement speed and damage of units in 700 AoE by 15%/20%/25%. This debuff can be removed by purge.
3. The actual AoE of the spell is 100/1325/1350.
4. You need the skill Necromastery in order for this skill to do any damage.
5. For every two souls captured by Necromastery (Stores max of 30), one line is created in his ultimate, for a maximum of 15 lines.

These lines deal the stated damage in a cone shape starting from Nevermore. They are shot out uniformly from Nevermore, with the first line extending directly to the East of Nevermore; in other words, the angle between each line is given by 360 degrees / # of lines. Because each line has a cone shape, their AOE overlap heavily, especially close to Nevermore. Therefore enemy units close to Nevermore suffer much more damage from Requiem of Souls than units far away.
This picture will make it more clearer:

The enemies in darker region of this pic shall receive more damage.
It is possible to cause an enemy to take damage from every single line with the help of Lothar's Edge, which has an active Wind Walk that removes collision. Wind Walking so that Nevermore's model and the enemy's model overlap will cause the lines to spawn on top of both units, with every single one dealing damage to the hapless enemy.

Lifesteal fiesta - Open Wounds

Open Wounds (Nai'x)
Skill Description: Naix rends the enemy, slowing his movespeed and allowing his allies to feast on his life force, regenerating a portion (10%/15%/20%/25%) of the damage dealt. Victim slowly recovers movement speed over 7 seconds. Mana Cost: 70/80/90/100. Cooldown: 30/25/20/15 .

Explanation: Now some important points on this skill:
1. The percentage given in the tooltips is the lifesteal percentage, not the slow.
2. Open Wounds will stun the enemy for 1 sec, 70% slow for 1 sec, 60% slow for 1 sec, 50% slow for 1 sec, 30% slow for 1 sec, and 10% slow for 3 seconds. (8 seconds in total)
3. This skill stuns the target for 1 second at all levels.
4. Linken's Sphere will block the 1 sec stun but not the slow. However, there is another 0.1 second stun so Open Wounds will still cancel channeling even if you have Linken's Sphere.
5. Casting nukes or other damaging spells on the target will also regenerate your HP.
6. The slow is removed by Purge. However, the subsequent reapplications of "slow" that create the gradual recovery of speed will not stop.

So, you can see why its a lifesteal fiesta for a team.

Lane Creep Upgrades

So everyone must have noticed the lane creeps grow bigger and stronger as the game progresses. Hope this post helps you understand in more detail the process of creep upgrades. Read on...

The spawned creeps (ie. Treants, Druids, Glaives etc) undergo a number of upgrades throughout the game to allow the game to end faster. There are basically three different upgrades that happen:
1. Periodical buff to HP and Damage
2. Increase in creep numbers
3. Buff resulting from destroyed Barracks

Periodical buff to hp and damage
This upgrade happens every 7:30 minutes. This is indicated in the creep's portrait like below:

Thus, after 15 minutes, the number will be 2 to indicate to levels of upgrades that have occurred.

Note that this upgrade only happens to Treants/Ghouls and Druids/Necros, not Glaives/Meat.

The buffs that happen are:
+10 HP
+1 min & max damage for Treant/Ghouls
+2 min & max damage for Druids/Necros

-----
Illustration: Here's an illustration to help you better understand.

Initial HP of Treant: 550
Initial Dmg of Treant: 19-23

After 22:30 minutes (3 upgrades), the creep would have:
HP: 580
Dmg: 22-26
-----

Increase in creep numbers
If you've been playing for a while, you might have noticed that the number of creeps increase as the game goes on.
Treants/Ghouls increase by one at minute 17:00 and increases every 16:30 minutes to a cap of 6 creeps.
Druids/Necros & Glaives/Meats increase by one at minute 45:00 to a cap of 2 creeps.

-----
Illustration:
What it means is that throughout the whole game you can only have a maximum of 6 Treants/Ghouls, 2 Druids/Necros and 2 Glaives/Meats.

Thus, creep increments for Treants/Ghouls will only occur at minute 17:00, 33:30, 50:00.
Creep increments for Druids/Necros & Glaives/Meats will only occur at minute 45:00
-----
In summary:
1:30 - 3 Melee, 1 Ranged (1 Siege)*
17:00 - 4 Melee, 1 Ranged (1 Siege)
33:30 - 5 Melee, 1 Ranged (1 Siege)
45:00 - 5 Melee, 2 Ranged (2 Siege)
50:00 - 6 Melee, 2 Ranged (2 Siege)
* Siege initially spawns at minute 4:30 and every 7 waves
Note: This does not apply to -lm or -rd modes.

Buff resulting from destroying barracks
When the barracks at the opponent's lane is destroyed, the creeps in that lane will get an upgrade. In order to calculate the buff to the creep, the following formula is used:

Treants/Ghouls
HP = 150 + 9a
Min Dmg = 17 + a
Max Dmg = 21 + a
Armor = 1

Druids/Necros
HP = 175 + 8a
Min Dmg = 20 + a
Max Dmg = 20 + a
Armor = 1

Glaive Thrower/Meat Wagon
Dmg increases from 35-46 to 51-62 when ranged rax is destroyed

where a = Upgrade Level

-----
Illustration:
If after 22:30 minutes, the middle lane's barracks (for Treant) has been destroyed, the Treant's stats would be:

HP = 580 + 150 + 9(3) = 757
Dmg = (22 + 17 + 3)-(26 + 21 + 3) = 42-50
Armor = 2 + 1 = 3
-----

Mega Creeps
Mega creeps happen when all the barracks in the opponent's base are destroyed. All your creeps will gain a level 30 upgrade. 

Note that if middle lane has the last barracks that is destroyed, top and bottom lanes' creeps would instantly upgrade to Mega level while the middle lane's would only have upgraded creeps when they next spawn.

Inspired from MrX's guide on Neutral creeps at DA.

Lifesteal - just a fact...

    
Mask of Death, Mask of Madness, Helm of the Dominator and Satanic have the ability "Lifesteal" which, as its name suggests, steals some of the attacked target's life and adds it to the Hero's own with no other effects. Here are some important points on lifesteal:
- The amount of life stolen is based on the damage done to the target after armor reduction. Therefore, Critical Strikes will cause the attacker to steal extra life for that attack, and abilities that reduce armor such as Assault Cuirass's armor reduction aura and Weave will cause the attacker to steal more life.
- You only lifesteal from the main target, never from units that got hit by Cleave, Splash, Moon Glaives or Split Shot.
- Lifesteal does not work on illusions, even though the graphics may suggest so.
- As far as orb effects are concerned, lifesteal overrides all other item orb effects. (Except ranged eye of skadi slow which is actually a buff not an orb. i.e. lifesteal and eye of skadi work together perfectly on ranged hero)
- For those who don't know, if you got two orb lifesteal items, only one will work. The item in the highest priority slot will override the other. Primary priority is highest row, secondary priority is left over right.
- Also note that while Vampiric Aura[Skeleton King] and Vladmir's Offering are similar to lifesteal and follow all the rules of the orb effect Lifesteal, they themselves are Auras and not orb effects, and can stack provided they give different debuffs to the target. Similar is Lifestealer's Feast which stacks with everything.

Total Annihilation!!! - Echo Slam

 
Description: Raigor sends shockwaves shooting through the ground, dealing damage ricocheting to nearby targets for additional damage. Deals 200/275/350 initial damage and 35/45/65 echo damage.

Mechanics:
- The initial wave actually deals 165/230/285 damage but each unit is hit by its own echo wave, so it evens out to 200/275/350 damage to a single unit like the spell says. So if you use it at level one with only one enemy unit nearby, it will deal 200 damage. If there are two units, it will deal 235 damage to each of them. If there are three, it will deal 270 to each, and so on.
- Although it does not affect them, Echo Slam bounces off of invisible units, magic-immune units, corpses, and units that are in the process of dying. The fact that it works with corpses is extremely helpful for using Echo Slam with Refresher Orb because you can effectively get the full damage twice even if almost everything died during the first cast.
- The AoE of slam’s initial/actual wave is only 500. The AoE of each echo wave is also 500. So, potentially the spell can damage a unit which is 1000 range away from raigor, but the unit can get hit only by an echo wave. Here’s a pictorial explanation. Open the picture in a new tab/window for better read.


1. Red dotEarthshaker himself. Forms the centre of the spell.
2. Brown dots – Units inside 280 AoE. Receive damage from initial wave, aftershock (3rd skill of Earthshaker) and echo waves within 500 AoE. These units will constitute for more echo waves.
3. Blue dots – Units inside 500 AoE. Receive damage from initial wave and echo waves within 500 AoE but not from aftershock. These units also constitute for more echo waves.
4. Green dots – Units inside 1000 AoE. Receive damage from only echo waves within 500 AoE. These do not constitute for more echo waves.
5. Pink units – Units outside 1000 AoE. These units do not receive any damage.
So it must be clear to you by now that (generally) units inside 280 AoE of echo slam receive maximum damage.

Other points of note:
- The area of effect is calculated right when Echo Slam is cast so if a hero runs out of the AoE after Raigor casts it, the waves will follow the hero out of the area. The same thing also happens with Echo Slam's echo damage.
- Does not damage decrepified units.
- Not blocked by linken’s sphere.
- Deals magical damage which is reduced by spell resistance.
- The initial wave (165/230/285) damages units with Spell Immunity but the echo waves do not.
- The spell has no cast point i.e. it activates immediately.
- The only units not counted for the extra damage are the ones with the Marker ability. [To be discussed in some other post]

Dotasecrets Quiz No.1

Here is a short quiz of 5 questions. Lets see how many you get right? Click Here to attempt the quiz.

Anchor Smash

 
Skill description: Leviathan swings his mighty anchor with a vengeance. Gives a 20% chance to deal bonus damage to nearby enemies. Deals 75/115/155/200 damage in a small radius. Passive skill.

Mechanics: So the description part was what we all know. Now time for some interesting facts:

- Deals magical damage reduced by spell resistance. However, it is not blocked by spell immunity (doesn't care if the enemy is spell immune).

- The additional damage from Anchor Smash is not added into the calculations for Critical Strikes, Lifesteal, Cleave or any other similar attack modifier.

- This skill triggers before the damage point, meaning that this skill may proc whenever the Tidehunter starts his attack animation. This also means that this skill neglects evasion.

- AoE of Anchor Smash: 200 Full Damage Radius, 325 Half Damage Radius. 
Explanation: The Area of Effect for Anchor Smash consists of two full circles of different sizes with leviathan standing in the center of these circles, within these two circles the damage is dealt. Within the smallest of the two circles, which is closest to the attacker, the full Anchor Smash damage (200 at lvl4) while within the remaining area between the big and the small one only half the damage ( 100 at lvl4) is dealt.

- Note that having Battle Fury on Leviathan does not make you Anchor Smash all the time even though the same animation is used, you will Cleave on all attacks and on those attacks which Anchor Smash triggers you will both Cleave and deal extra damage in the area around you.

Towers - Happy New Year from dotasecrets.co.nr

First of all, a very happy new year 2009 to all. May this year bring you lots n lots of joy and happiness. (And most of all more DotA PWNage) Today I'm posting on a topic that I myself enjoyed researching about. ENJOY!
We all are familiar with the thing that we hate to confront and love to break. Its the tower. Here are some crucial points to note about:
- Attack range of a tower is 700 but its true sight range is 800.
- Level 1 towers deal Normal damage. Higher level towers deal Siege damage. They all have Fortified armor.

Bounty

Only the killing unit receives the bounty stated in the unit box. All other heroes on the team receive 200/240/280/320 gold, depending on the level of the tower.

If a tower is destroyed by the Sentinel or Scourge, all the heroes on that team will instead receive 315/350/385/420 gold, plus a random amount of gold between 1.4 and 14. If a tower is denied, the gold granted to the other team is halved.

Target Selection

I would not be going too deep into the mechanics of this, but focusing on the important parts.

In a way, the tower asks himself three questions before hitting/changing a target. These are (in order):
1. Is someone attacking my allied unit?
2. Whose %hp is less?
3. Who is closer?

1. Is someone attacking my allied unit? Yes. Then whom to hit?
Answer.
Priority #1: Unit attacking allied hero.
Priority #2: Current tower target.
Priority #3: Unit attacking tower.
Priority #4: Enemy units attacking allied non-hero units.

2. OK. So, there are multiple units ahaving same priority. What to do?
Answer. Hit the one with lower %hit points.

3. Two have the same %hp left. Now what?
Answer. Hit the one who is closer.

Note: This is just a rough way to find out who will be the target of the tower.

Some Spells that deal damage to towers

Worth making a note in mind:
Land Mines (Techies)
Scattershot (Sniper)
Toss (Tiny)
Return (Bradwarden)
Empowering Haste (Spiritbreaker)
Nether Blast (Pugna)
Searing Arrows (Bone Clinkz)
Diabolic Edict (Leshrac)

Inspired from DA-Wiki.